VSCode+CubeMX开发STM32笔记-Uart串口使用
使用VSCode+CubeMx开发STM32,这里介绍GPIO外部中断和按键的使用;
1.建立工程
1.1 创建项目文件
从已有的仓库中创建一个工程:
1 | git clone https://github.com/makerinchina-iot/vscode_stm32cubemx_hello.git button |
使用VSCode打开工程后,需要更改如下名字:
- 文件夹根目录下CMakeLists.txt 文件中修改工程名字为button:
1 | set(CMAKE_PROJECT_NAME button) |
- stm32cubemx配置文件更改为 button.ioc ,并更改以下文件名:
1 | ... |
1.2 引脚配置
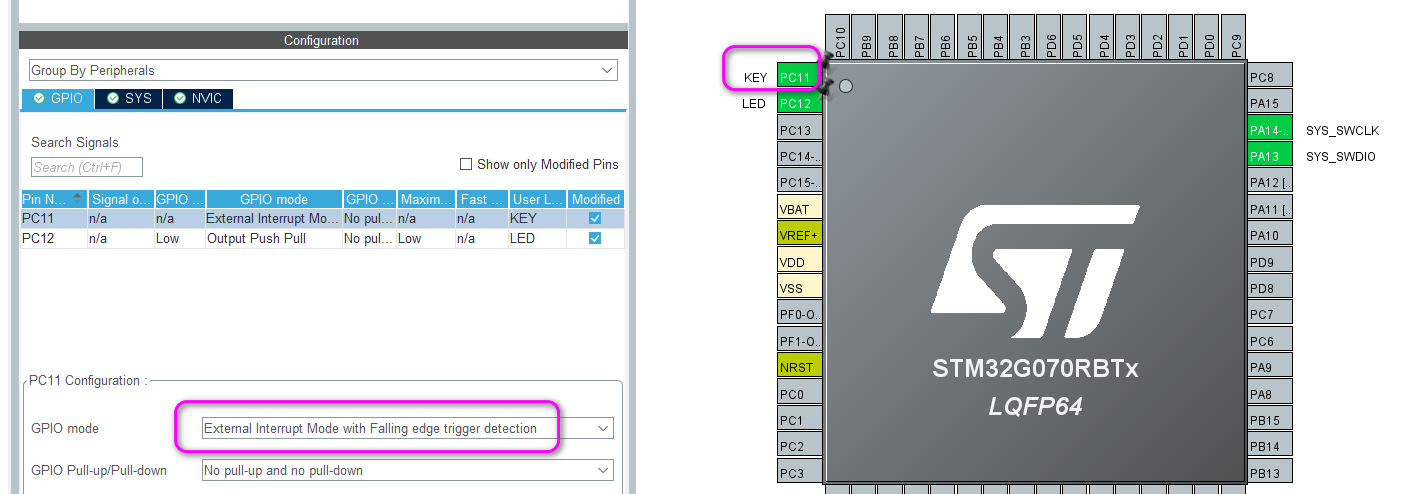
使用STM32CubeMx打开ioc配置文件,然后配置按键对应的引脚:

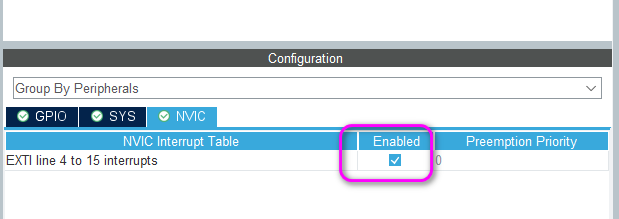
然后在NVIC中使能中断:

2. 编写代码
在main中添加中断回调函数如下:
1 | void HAL_GPIO_EXTI_Falling_Callback(uint16_t GPIO_Pin) |
烧录代码后即可看到按键按下时候灯亮灭翻转,并打印按下操作:

著作权归本网站(https://makerinchina.cn)所有,转载请注明来自 MakerInChina.


