文章同步发布到公众号【电子技术攻城狮
1、新建项目 1.1、新建工程 打开PyCharm,新建工程cameraViewer,如下:
1.2、添加python主程序 在项目中新建main.py 主程序如下:
1
2
3
4
5
6
7
8
9
10
11
12
13
14
15
16
17
18
19
20
21
22
23
24
25
26
27
28
29
30
31
32
33
34
35
36
37
import osimport sysfrom pathlib import Pathfrom PySide2.QtCore import Qt, QObject, Slot, QCoreApplicationfrom PySide2.QtQml import QQmlApplicationEnginefrom PySide2.QtWidgets import QApplicationclass Controler (QObject ): def __init__ (self ): super ().__init__() @Slot() def exit (self ): sys.exit() if __name__=='__main__' : a = QApplication(sys.argv) a.setOverrideCursor(Qt.BlankCursor) engine = QQmlApplicationEngine() controler = Controler() context = engine.rootContext() context.setContextProperty("_Controler" ,controler) engine.load(os.fspath(Path(__file__).resolve().parent / "ui/camera.qml" )) if not engine.rootObjects(): sys.exit(-1 ) sys.exit(a.exec_())
主程序中,只用于显示qml界面,并添加了一个退出程序的函数供界面调用。
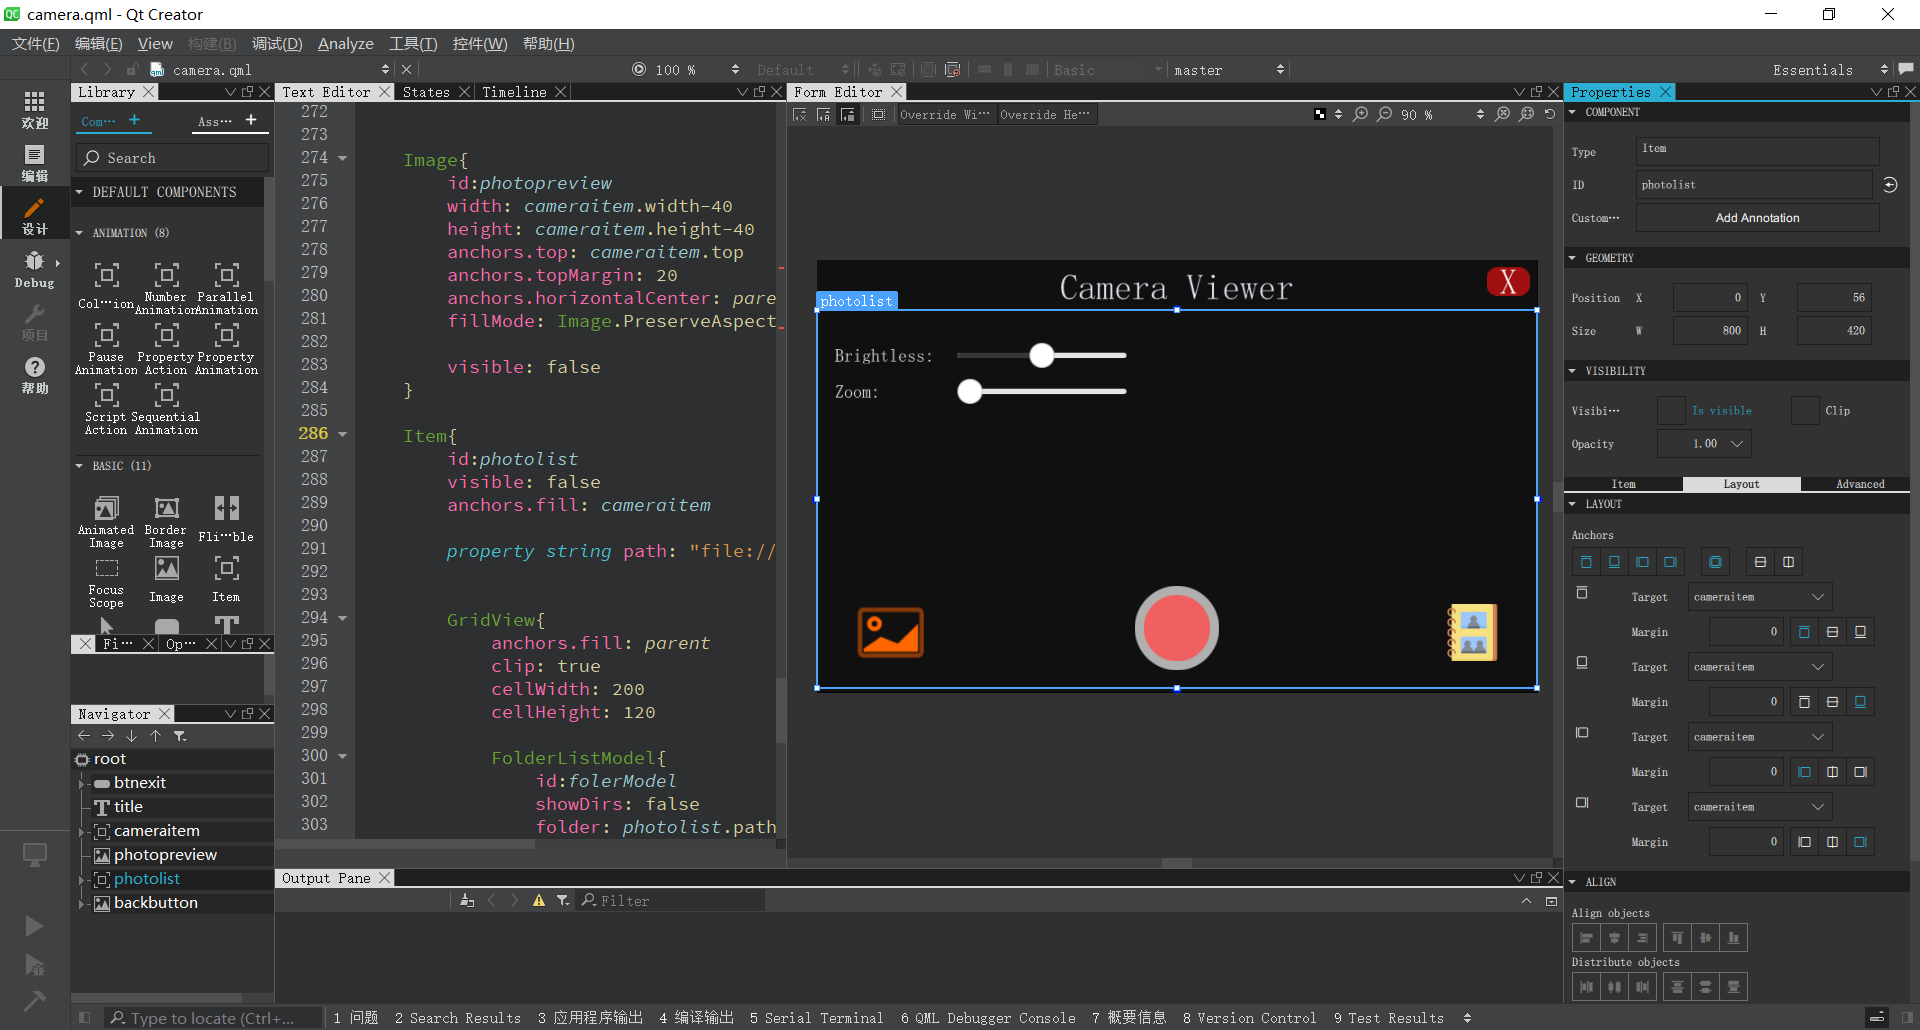
1.3、添加界面文件
在项目中添加ui文件夹,并在ui文件夹下新建camera.qml文件,界面如下:
主要参考代码如下:
1
2
3
4
5
6
7
8
9
10
11
12
13
14
15
16
17
18
19
20
21
22
23
24
25
26
27
28
29
30
31
32
33
34
35
36
Camera { id :camera viewfinder { resolution : Qt .size (800 , 480 ) maximumFrameRate : 30 } imageProcessing{ brightness : cameraitem.brightless whiteBalanceMode : CameraImageProcessing .WhiteBalanceFlash } exposure { exposureCompensation : -1.0 exposureMode : Camera .ExposurePortrait } flash.mode : Camera .FlashRedEyeReduction imageCapture{ id :cameraCaptureImage onImageCaptured : { photopreview.source = preview console .log ("captured image:" ,preview) } } digitalZoom : sliderZoom.value } VideoOutput { id :viewer anchors.fill : parent source : camera autoOrientation : true focus : visible fillMode : VideoOutput .PreserveAspectCrop }
主要使用了Camera和VideoOutput组件来进行摄像头操作,其他部分只是按键等操作控件使用。
使用camera组件的imageCapture来抓取当前的图像,默认图片保存在 树莓派路径:/home/pi/Pictures/ 下。
2、执行程序 2.1、上传程序到树莓派 在工程上右键将这个项目文件上传到树莓派中:
2.2、执行程序 上传后,在树莓派对应文件夹中,执行如下命令执行程序:
如果出现类似:no service found for - “org.qt-project.qt.camera” 这样的错误,需要安装对应的库:qml-module-qtmultimedia python3-pyside2.qtmultimedia libqt5multimedia5-plugins
执行后可以看到显示如下: https://github.com/makerinchina-iot/raspberry_pyside_notes 视频演示:

 】 介绍在树莓派上使用python和qt开发一个camera程序,开发工具使用PyCharm和QtCreator,开发方式为Pyside2+QML。
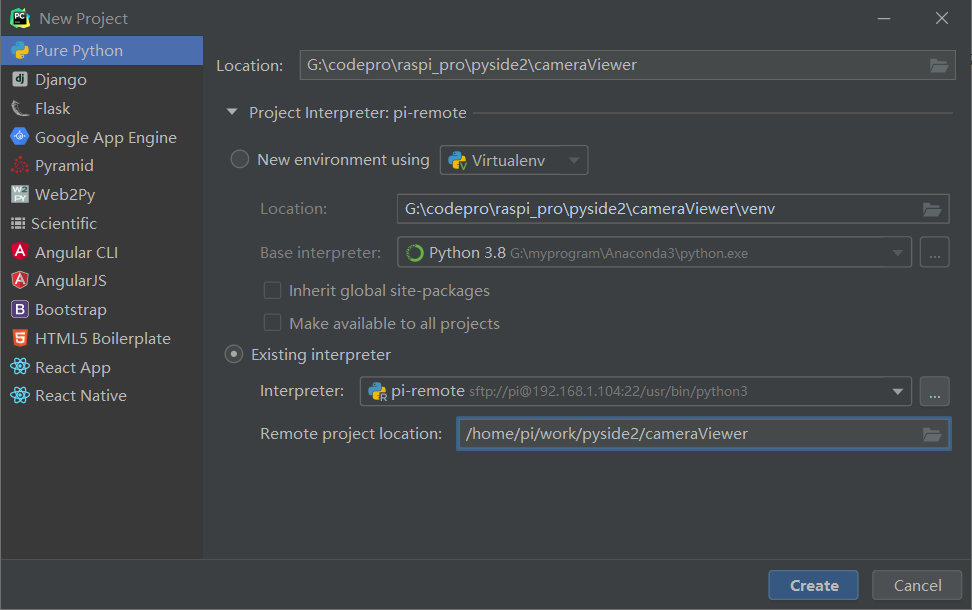

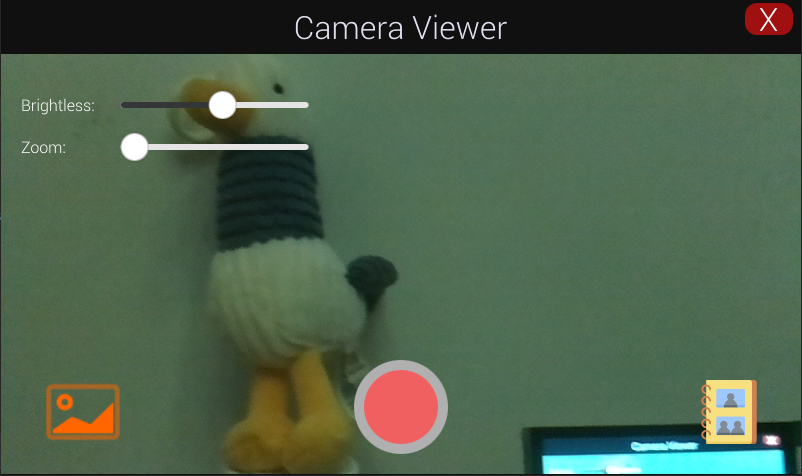 可以通过 Brightless来调节亮度,通过Zoom来调节焦距,点击下面的红色按钮进行照相,然后左边按钮为查看当前照相的图片,右边为查看所有的图片文件。 完整代码:https://github.com/makerinchina-iot/raspberry_pyside_notes 视频演示: